8.5x11 / A4 Shopify Packing Slip Code Template Instructions - Design A
This guide will provide you with all the steps required to add your new Shopify Packing Slip template to your Shopify site. If you haven't purchased the template yet, you can find it by clicking here.
To complete this set up process you will need to have an image for your business logo and have downloaded the template code, which will have been emailed to you following your purchase (shopify_packing_slip_design_a.txt).
Step 1 - Log into Shopify
Step 2 - Upload your business logo to Shopify
- Within the Shopify Admin area, click on Settings in the bottom left-hand corner of the screen
- Select Files from the left-hand menu
- If you do not already have a logo image uploaded, click Upload Files and upload your business logo image (for best results, ensure the logo is cropped, so whitespace around the image is removed)
- Within the file table, click the link icon to the right of the logo and copy the image URL

- Paste the link copied in part 4 somewhere that can be easily accessed later on in the process
Examples of where you could paste the links are Notepad or Word applications. It does not matter which you choose, as the links only need to be held temporarily whilst you set up this template.
Step 3 - Add the new template code
- Select Settings (bottom-left menu within the Shopify admin area)
- Select Shipping and Delivery
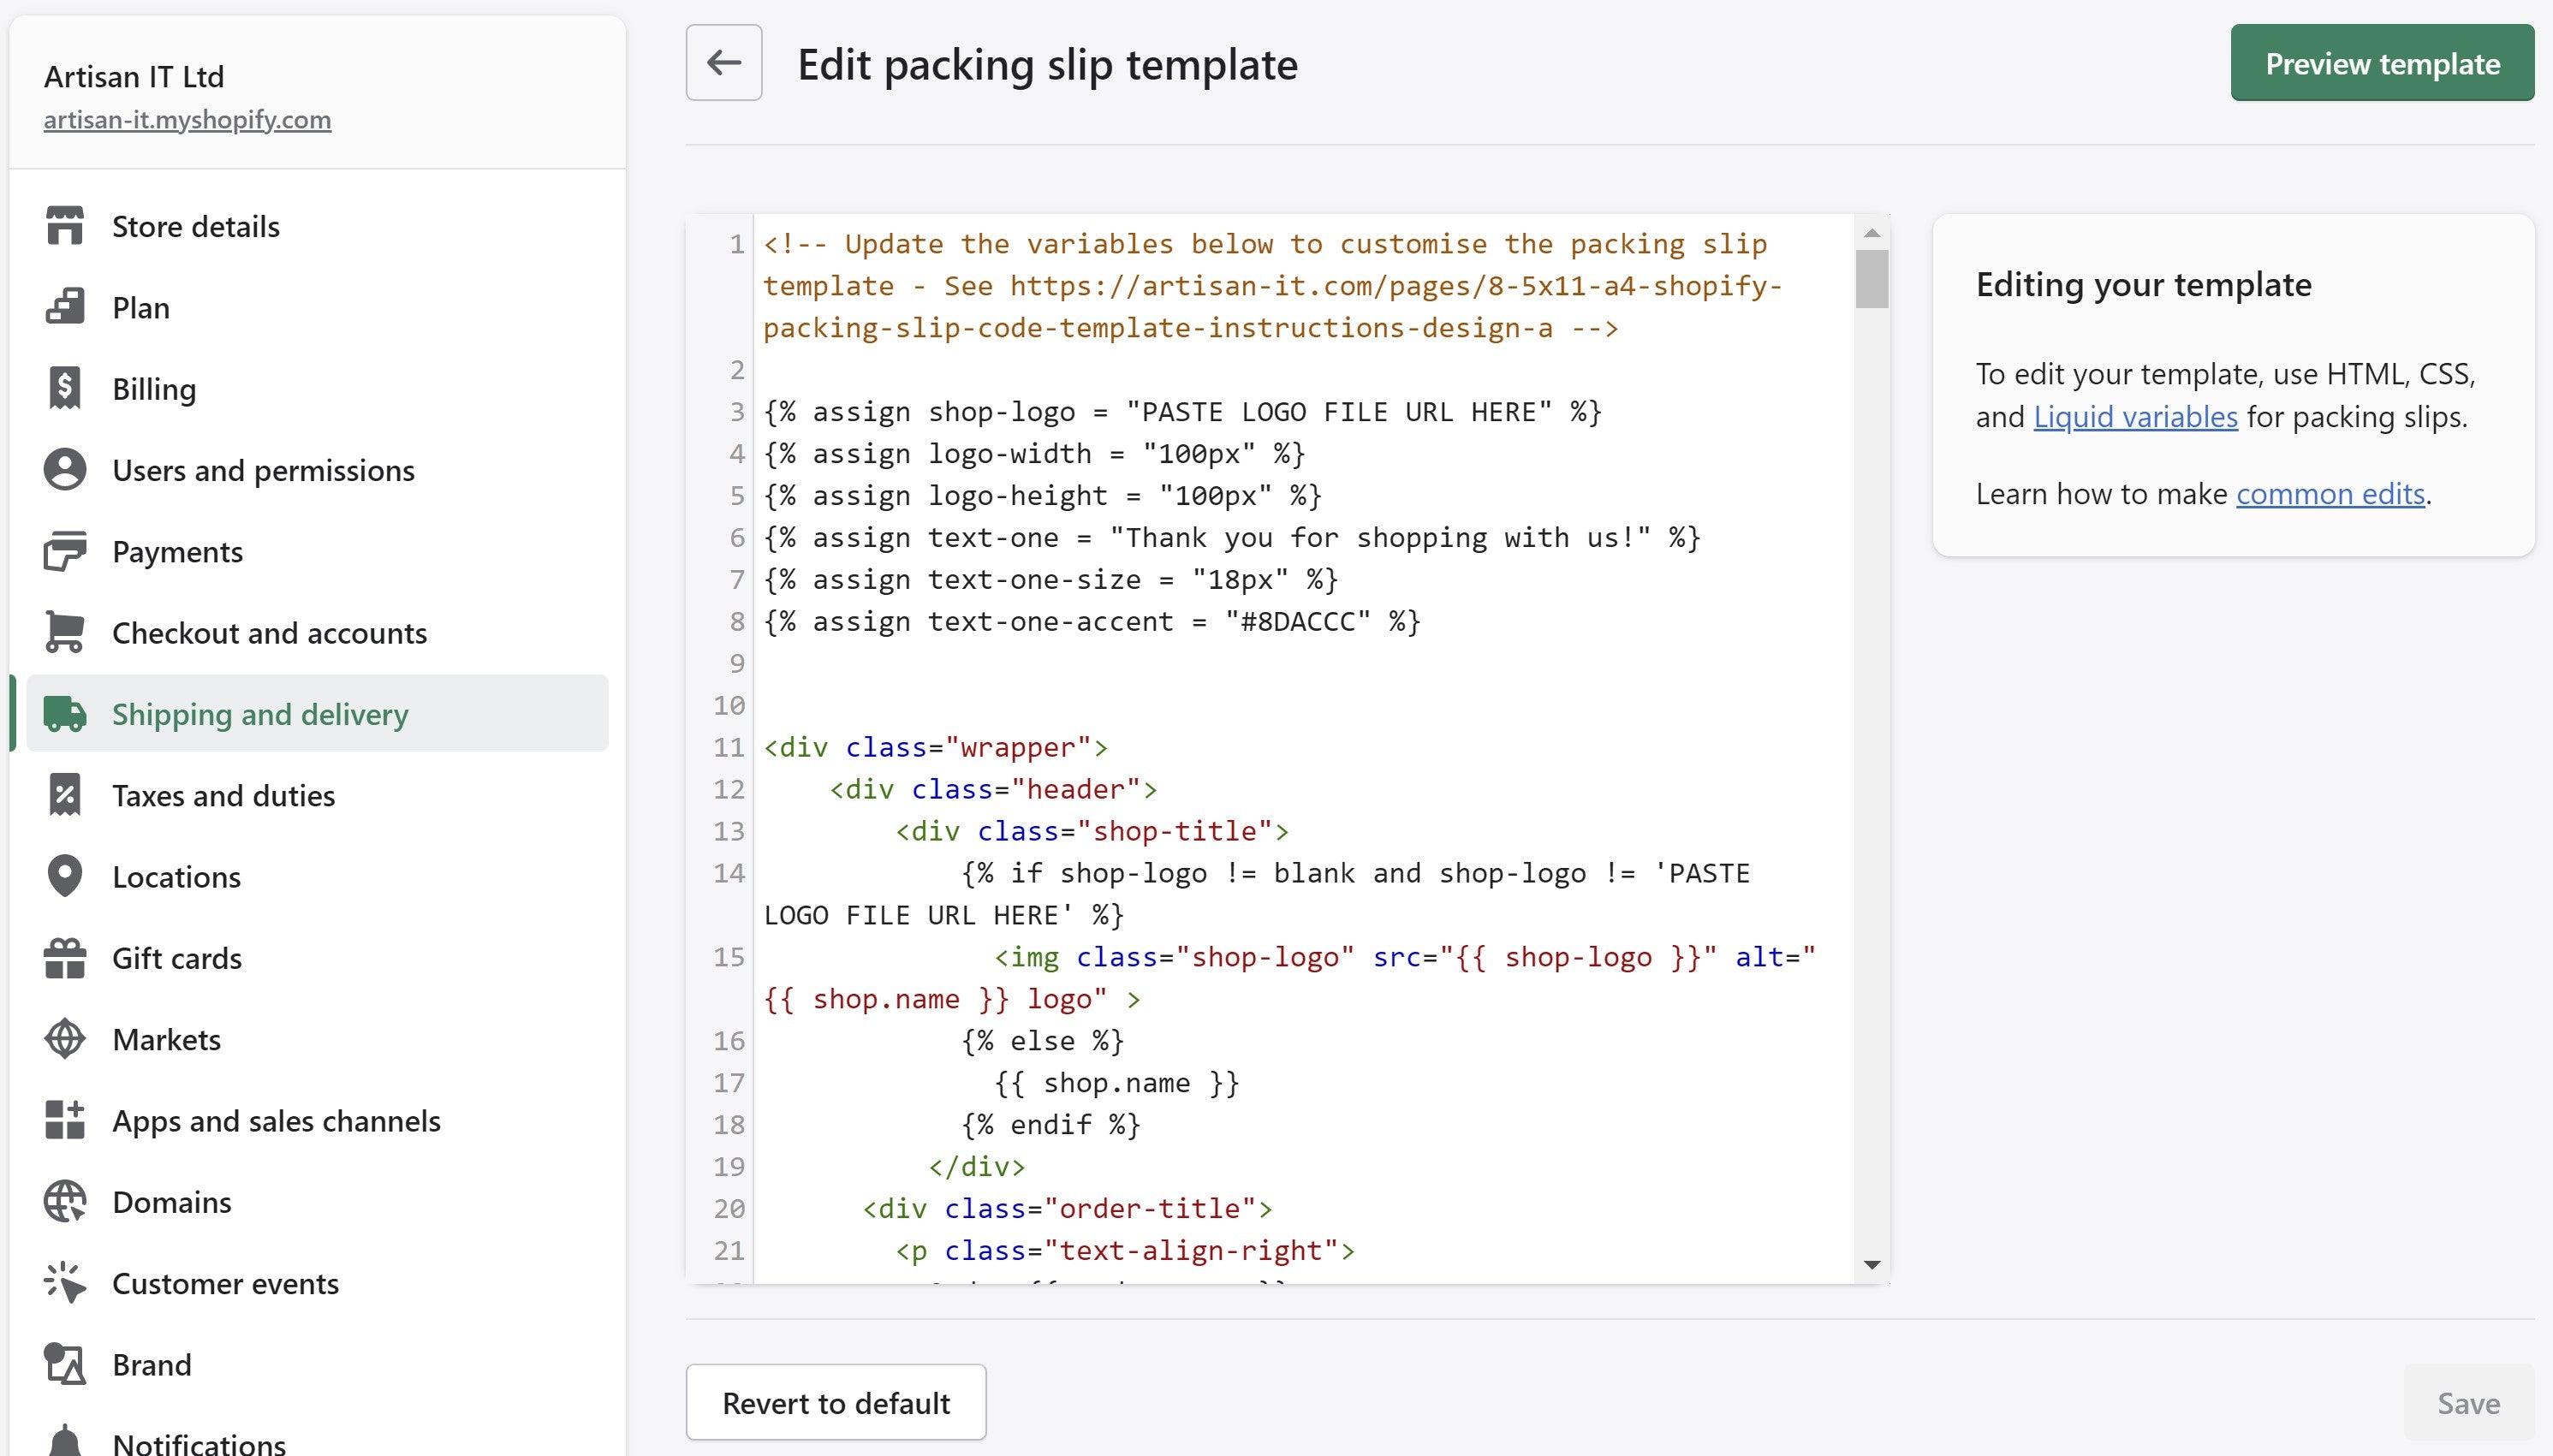
- Scroll down the page and within Packing Slips click Edit
- If you have previously customised the packing slip template, you may wish to copy the code and save in a file for future use (the default Shopify packing slip does not need copying, as you can always revert back to the default if you wish)
- Highlight all of the code in the Packing Slip Template and press Delete
- Highlight and copy all of the code beneath the dashed line for your new packing slip in the downloaded file shopify_packing_slip_design_a.txt
- Paste the copied code into the Packing Slip Template in Shopify on line 1

Step 4 - Add your business logo to the new template
- On line 3 {% assign shop-logo = "PASTE LOGO FILE URL HERE" %}, replace PASTE LOGO FILE URL HERE with the image URL that was copied in Step 2, Part 4 (do not delete the speech marks)
- Adjust the logo width and height values on lines 4 and 5
Step 5 - Set the first line of text displayed beneath the product section
- If you want to change the first line of text, edit the text on line 6 within the two speech marks (default is "Thank you for shopping with us!")
- The font size for the first line of text can be altered on line 7. So if you would like the font size to be increased to 20 pixels, the line of code would look like this {% assign text-one-size = "20px" %}
- The font colour for the first line of text can be updated on line 8, by entering a hexadecimal value between the speech marks
Step 6 - Save and preview the template
- Click Save
- Click Preview Template
Printing the documents
- Click Orders within the left hand menu of Shopify Admin
- Select all of the orders that you would like to print packing slips for
- Click the ... ellipses button
- Click Print packing slips
- Click Print
- To save the documents as a PDF, change the print destination to the relevant PDF setting
- If the colours are not correct on the printout, on Google Chrome, click More Settings and within Options ensure Background graphics is checked
- If you wish to remove the webpage header and footer generated by the browser, within Options uncheck Headers and footers
